Learn how GitHub Actions and OpenFaaS can be used for simple functions at the edge of your network.
The edge of reason
If like me, you’re close to the world of Kubernetes, then you would probably assume this platform is the only real option for both cloud and edge computing. In fact, with the advent of K3s by Darren Shepherd, Kubernetes is becoming a reality at the edge. I even wrote a course for the LinuxFoundation on running Kubernetes at the Edge.
So would it be reasonable to run anything other than Kubernetes at the edge?
If you’re running Kubernetes in production then you’ll be aware of how difficult it can be to operate. Not only do you need to learn its concepts and API, but if you extend it in any way, then you’ll be needing to maintain all your custom changes over time. As the author of several applications and operators targeting Kubernetes, I have to dedicate much of my time to maintenance and migrations.
I want to show you how to build functions at the edge of your network with the faasd project. faasd is the same OpenFaaS that you know from the world of Kubernetes, but repackaged to be vastly simpler to use on IoT devices. Unlike K3s, it barely consumes any resources at idle, its API is stable and upgrades are as simple as replacing a binary.
What K3s did for Kubernetes, faasd does for functions.
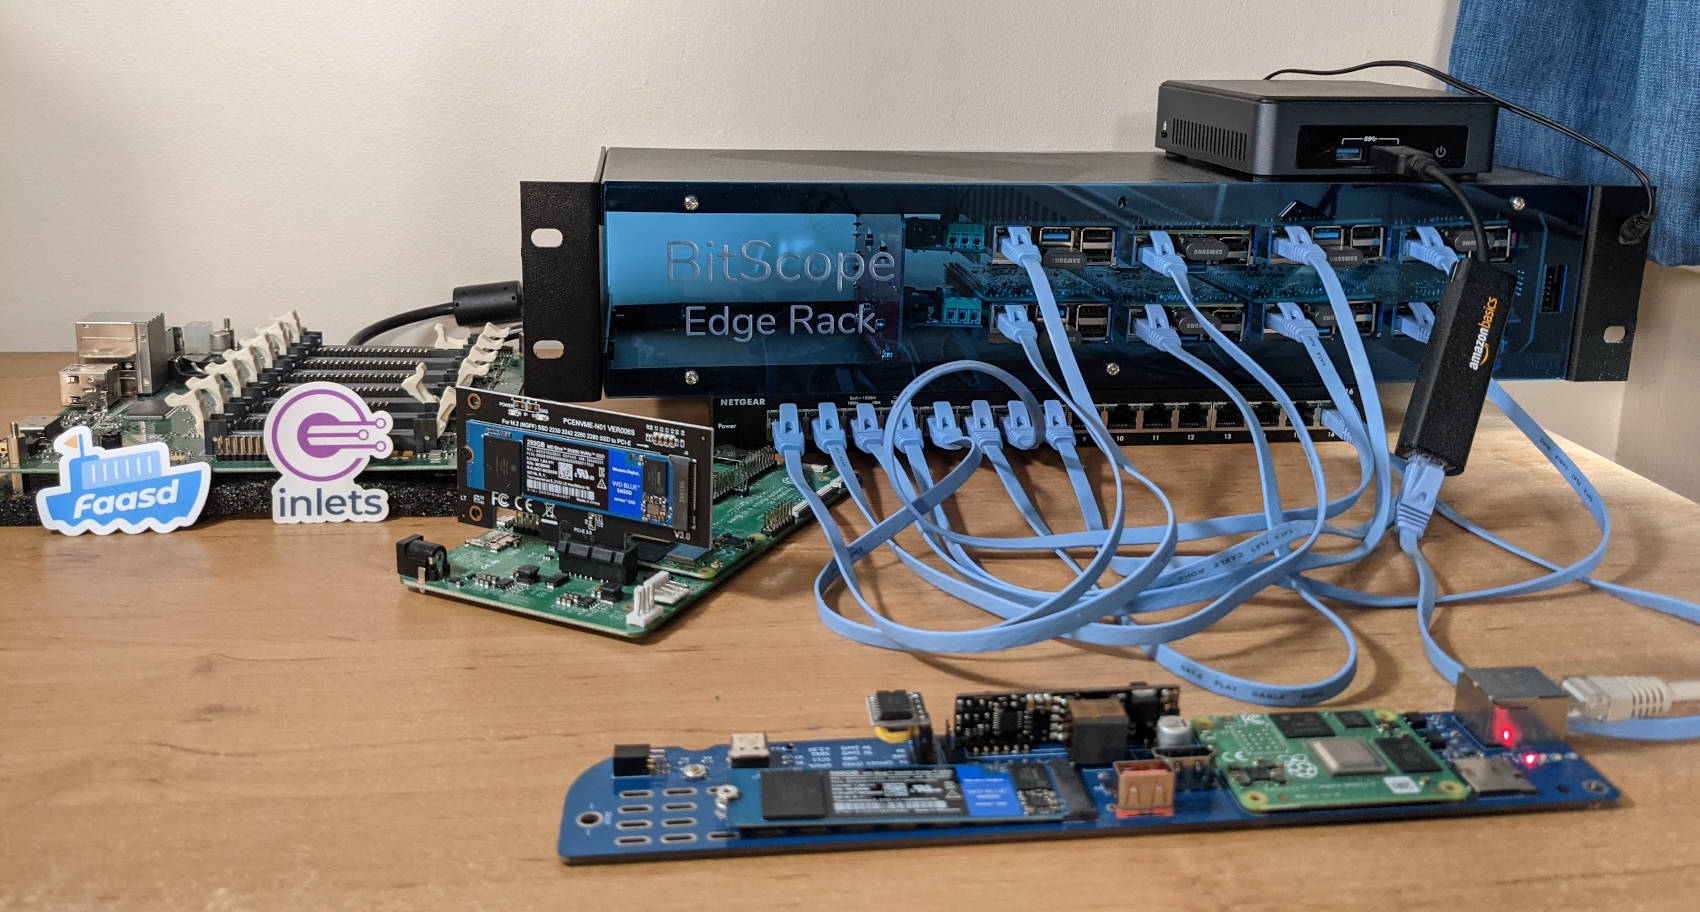
Pictured: Intel NUC, Bitscope Edge Rack and 6x RPi 4, Turing Pi, Compute Module Carrier with NVMe, PoE Cluster Blade.
An edge device can be any kind of computer that runs within a network closer to users. There are a number of industrial and hobbyist-grade options available for running workloads on private clouds. These can be connected to and managed by a central system or source of truth like GitHub.
So what reasonable person would deploy faasd instead of Kubernetes?
- If you need a few functions to extend a SaaS or respond to webhooks
- You want to run a few cron jobs and write them using real code like JavaScript, Go or Python
- You want to package up functions and something to run them as an appliance
- You need to run at the edge or on IoT devices
In this article, I’ll show you what it looks like to build and ship functions to your edge using faasd and GitHub Actions.

Conceptual diagram OpenFaaS at the edge, managed by GitHub Actions
What can you run with OpenFaaS?
OpenFaaS functions are built into containers, and anything that can be packaged as a container image can be made into a function - whether that’s bash, PowerShell or a language that supports a HTTP server like Java, Go or Python.
GitHub Actions is a versatile platform that can be used to build OpenFaaS functions. GitHub Container Registry then provides a convenient place to store these images before deploying them to faasd.
How do you trigger functions
A function can be invoked via a HTTP request using its URL - either synchronously or asynchronously. The asynchronous endpoint is better for longer-running tasks, or when your calling client needs a response within a short timeframe to prevent a retry.
Functions can also be triggered from a cron schedule or through another supported event trigger such as Apache Kafka.
Once you have a secure link to provide ingress to your edge environment, you could also invoke functions using a GitHub Action and a HTTP / curl request.
The lab
I’ll walk you through building a lab for your edge computing environment. We’ll start by setting up a Raspberry Pi with an operating system, installing faasd and then building a GitHub Action to build, publish and deploy a function over a secure inlets tunnel.
Provisioning the edge device
I’m using the Raspberry Pi as an edge device, however you could also use a 64-bit PC, an Nvidia Jetson Nano or a Virtual Machine in your on-premises hypervisor.
You can deploy faasd to the Raspberry Pi Zero W (512MB), Raspberry Pi 3 (1GB) and Raspberry Pi 4 (1-8GB). I prefer Raspberry Pi 4 since it has faster I/O and more memory capacity than its predecessors. How much RAM you’ll need depends on the number and size of your functions. A 2-4GB model is a good place to start exploring and gives you some room to grow.
All of the models I mentioned support both a 32-bit and a 64-bit Operating System. faasd supports both types of arm architecture, but you should be aware that you’ll need to cross-compile your functions for whichever you choose. We’ll find out how in the GitHub Actions section.
My preference is for the 32-bit official OS “Raspberry Pi OS Lite” which has the best all-round support and in my opinion, is more responsive than all the other options available. I’ve also set up Ubuntu 20.04 on the Raspberry Pi 4 and tend to find it consumes more memory out of the box and causes additional latency. Your mileage may vary.
I tend to use a 32GB Class 10 SD card, but it’s also possible to swap this for a USB hard drive or an SSD for additional reliability.
Download the Buster variant of the OS:
curl -SL -o 2021-05-07-raspios-buster-armhf-lite.zip \
  https://downloads.raspberrypi.org/raspios_lite_armhf/images/raspios_lite_armhf-2021-05-28/2021-05-07-raspios-buster-armhf-lite.zip
Then use your favourite tool such as Etcher.io to burn the image to the SD card. I tend to use dd on my Linux computer.
The next important step is to set up a ssh file so that we can use the Raspberry Pi headless. Create a ssh file in the /boot/ directory of the first partition of the SD card.
Boot up the Raspberry Pi, and change its hostname:
ssh pi@raspberrypi.local
sudo raspi-config
Set the hostname to faasd, set the memory split for the GPU to 16MB and then reboot.
Install faasd
Now reconnect over SSH and install faasd:
git clone https://github.com/openfaas/faasd --depth=1
cd faasd
./hack/install.sh
The final output will show a login command that you can use to determine the password for the OpenFaaS gateway. You will need this for your GitHub Action.
Run a few test commands to check everything worked:
faas-cli version
faas-cli store deploy nodeinfo

curl http://127.0.0.1:8080/function/nodeinfo
You now have a fully-functioning edge device with OpenFaaS and have deployed your first function. You can find other sample functions by running faas-cli store list.
Get connected to GitHub
To connect to GitHub, or any other existing internal or SaaS system, you’ll need a public endpoint. We’ll use inlets to do this, which is available on a monthly subscription for personal or business use.
inlets is a tunnel that was created specifically with Cloud Native system and containers in mind. It’s secure, and unlike a VPN connects individual endpoints like your OpenFaaS gateway to other networks or to the Internet. It runs entirely in userspace and is probably one of the quickest options available for getting incoming traffic.
GitHub Actions also supports “self-hosted” job runners, which could be an alternative here, however the self-hosted runner would only allow us to deploy a function. It would not give us a public URL that could be invoked from a third party such as Stripe, PayPal, Gumroad, or some other SaaS system.
You can now create a server on your favourite cloud and install the inlets server process, or use the inlets CLI to automate the process.
In the above step you’ll have created a sub-domain and a DNS record such as edge.example.com. You’ll have also been given a URL for the inlets server’s control plane and a token for the inlets client.
We’ll run the inlets client on the edge device and install it via a systemd unit file, so it always runs for us and restarts if it gets disconnected for any reason.
inlets http client \
  --token $TOKEN \
  --url $URL \
  --upstream http://127.0.0.1:8080 \
  --generate=systemd > ./inlets.service
Next check the inlets.service file, and install it:
sudo cp ./inlets.service /etc/systemd/system/inlets.service
sudo systemctl enable inlets.service
sudo systemctl start inlets.service
Check it started OK with: sudo systemctl status inlets.service
You can now access your OpenFaaS UI from anywhere using its authenticated public HTTPS URL:
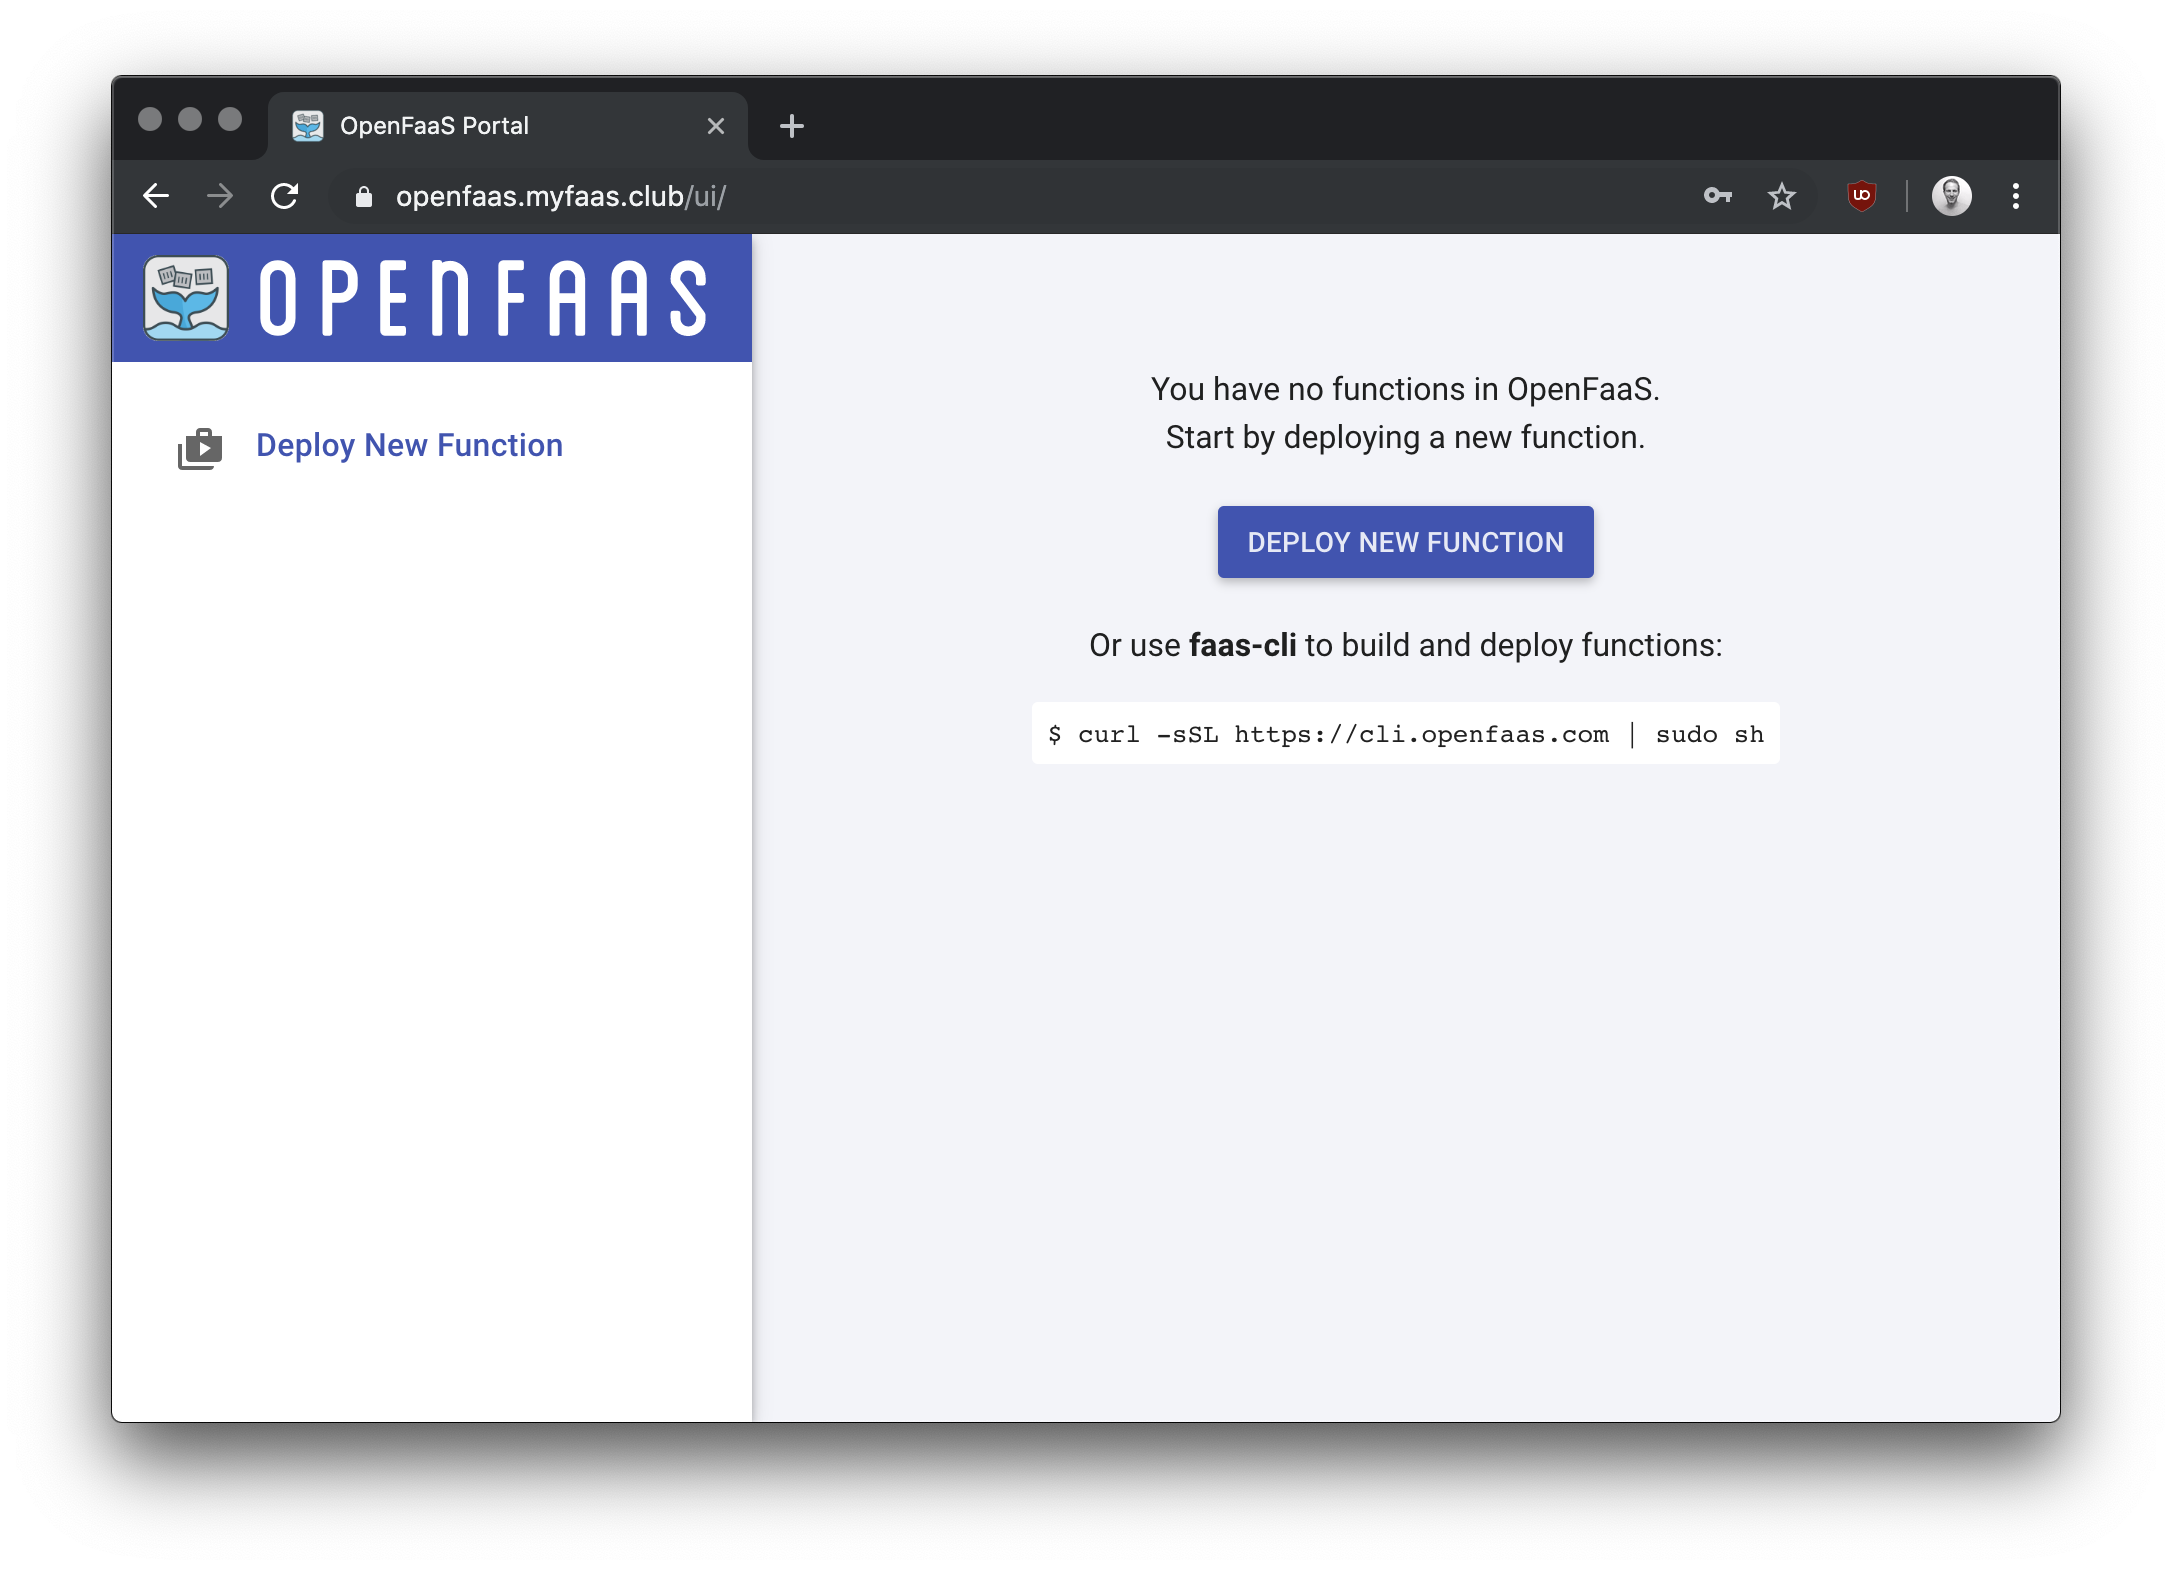
The OpenFaaS Gateway UI
Create a function to handle repository webhooks
We’ll create a new function to handle repository webhooks, these are events that happen on a GitHub repository such as push, PR and issue events.
Create a new GitHub repository and clone it to your system.
It’s now up to you to decide what language you want to write your functions in. Go and Python tend to use the least amount of resources, so if you want to pack in plenty of functions, they may be your best options. Node.js is also popular, but can be a bit more hungry for RAM.
Explore the templates, and note that not every template supports arm devices like your Raspberry Pi. Best stick to the official options if you’re new to OpenFaaS.
I’ll create a function called repo-events using the golang-http template:
faas-cli template store list
faas-cli template store pull golang-http

# Scaffold a function
faas-cli new \
  --lang golang-http \
  --prefix ghcr.io/alexellis \
  repo-events
This will create a file named repo-events.yml and a repo-events/handler.go file where you can write code in Go.
version: 1.0
provider:
  name: openfaas
  gateway: http://127.0.0.1:8080
functions:
  repo-events:
    lang: golang-http
    handler: ./repo-events
    image: ghcr.io/alexellis/repo-events:latest
package function

import (
        "fmt"
        "net/http"

        handler "github.com/openfaas/templates-sdk/go-http"
)

// Handle a function invocation
func Handle(req handler.Request) (handler.Response, error) {
        var err error

        message := fmt.Sprintf("Body: %s", string(req.Body))

        return handler.Response{
                Body:       []byte(message),
                StatusCode: http.StatusOK,
        }, err
}
For convenience rename repo-events.yml to stack.yml:
mv repo-events.yml stack.yml
Initialise the a Go module for your function:
cd repo-events/

go mod init
go mod tidy
cd ..
On your laptop or client machine (not on the faasd host), run the following:
DOCKER_BUILDKIT=1 \
  faas-cli build \
  --build-arg GO111MODULE=on

#28 writing image sha256:e5ff71c8fa666f6cffc866ee8339b01fcb7074c23deaddbd00e1056519e784d4 done
#28 naming to ghcr.io/alexellis/repo-events:latest done
#28 DONE 0.1s
Image: ghcr.io/alexellis/repo-events:latest built.
[0] < Building repo-events done in 10.62s.
[0] Worker done.

Total build time: 10.62s
You’ll need to have Docker installed locally for this to work.
Subsequent builds will be faster, as the various parts of the build will be cached.
Update the stack.yml file and add the following, so that the CI system won’t need to have faas-cli template store pull commands for the Go HTTP template.
configuration:
  templates:
    - name: golang-http
Build and deploy the function with a GitHub Action
- Enable GitHub Actions for your account or repository
- On the settings page create the following secrets
- Name:
OPENFAAS_URL, value: the gateway’s public HTTPS URL or inlets PRO tunnel URL i.e.https://edge.example.com -
Name:
OPENFAAS_PASSWORD, value: faasd’s basic auth password - Create the following file as
.github/workflows/build.yml
This is the top of the file which triggers a build named build upon every PR and push to a remote branch.
name: build

on:
  push:
    branches:
      - '*'
  pull_request:
    branches:
      - '*'
Then add the permissions for the GitHub token, so that the action can push to GHCR using its own temporary token. This is more secure than generating your own personal access token which has access to your entire account, and may not expire.
permissions:
  actions: read
  checks: write
  contents: read
  packages: write
Then provide the steps for the job:
jobs:
  build:
    runs-on: ubuntu-latest
    steps:
      - uses: actions/checkout@master
        with:
          fetch-depth: 1
      - name: Get faas-cli
        run: curl -sLSf https://cli.openfaas.com | sudo sh
      - name: Pull custom templates from stack.yml
        run: faas-cli template pull stack
      - name: Set up QEMU
        uses: docker/setup-qemu-action@v1
      - name: Set up Docker Buildx
        uses: docker/setup-buildx-action@v1
      - name: Get TAG
        id: get_tag
        run: echo ::set-output name=TAG::latest-dev
      - name: Get Repo Owner
        id: get_repo_owner
        run: >
          echo ::set-output name=repo_owner::$(echo ${{ github.repository_owner }} |
          tr '[:upper:]' '[:lower:]')
      - name: Docker Login
        run: >
          echo ${{secrets.GITHUB_TOKEN}} |
          docker login ghcr.io --username
          ${{ steps.get_repo_owner.outputs.repo_owner }}
          --password-stdin
      - name: Publish functions
        run: >
          OWNER="${{ steps.get_repo_owner.outputs.repo_owner }}"
          TAG="latest"
          faas-cli publish
          --extra-tag ${{ github.sha }}
          --build-arg GO111MODULE=on
          --platforms linux/amd64,linux/arm/v7,linux/arm64
      - name: Login
        run: >
          echo ${{secrets.OPENFAAS_PASSWORD}} |
          faas-cli login --gateway ${{secrets.OPENFAAS_URL}} --password-stdin
      - name: Deploy
        run: >
          OWNER="${{ steps.get_repo_owner.outputs.repo_owner }}"
          TAG="${{ github.sha }}"
          faas-cli deploy --gateway ${{secrets.OPENFAAS_URL}}
The first few steps set up Docker with buildx, so that it can cross-compile containers for different systems, this can be skipped if you only want to deploy to cloud or Intel-compatible faasd instances.
The next steps log into the ghcr.io registry using the GitHub token attached to the GitHub Action, it then runs faas-cli publish which builds and pushes a multi-arch image, and then logs into your remote gateway and does a deployment using faas-cli login and faas-cli deploy.
The --platforms flag should be customised to make your build more efficient. It is currently building for:
linux/amd64- regular PCs and cloudlinux/arm/v7- The 32-bit arm Raspberry Pi OSlinux/arm64- 64-bit arm servers or Ubuntu running on Raspberry Pi
So if you are only deploying your function to a Raspberry Pi with a 32-bit OS, just change that line to --platforms linux/arm/v7.
You’ll notice that the last step in the file does a deployment. If you don’t want builds to get deployed automatically, then you can put this into a separate file that gets run only when you do a release in the GitHub repository, splitting out CI and CD steps.
      - name: Login
        run: >
          echo ${{secrets.OPENFAAS_PASSWORD}} |
          faas-cli login --gateway ${{secrets.OPENFAAS_URL}} --password-stdin
      - name: Deploy
        run: >
          OWNER="${{ steps.get_repo_owner.outputs.repo_owner }}"
          TAG="${{ github.sha }}"
          faas-cli deploy --gateway ${{secrets.OPENFAAS_URL}}
Now run the following:
git add .
git commit
git push origin master
After a few moments, the GitHub Action will start. If you have copied everything correctly, then it should publish an image to GHCR.
If the image shows up as private, then you’ll need to make that image public so that faasd can access it. Go the Packages tab for your user account and make it public.
Then restart the job, or push another change to the repository.
There’s no shame in a few failed builds. Once you have it running, it’ll usually be able to build, publish and deploy your function in under a minute.
After a few moments you’ll see the function appear on your local faasd instance, run faas-cli list to verify the function is deployed.
I’m now able to invoke my URL:
curl -sL https://edge.example.com/function/repo-events
Over to you to extend the function
Google provide an excellent library called github-go which can be used to parse and respond to webhook events sent from GitHub.
As an exercise, why not enter your function’s URL (https://edge.example.com/function/repo-events) on the webhooks page of one of your GitHub repositories? Have it fire for an event you find interesting such as a new pull request, or a new issue.
Use the github-go library to validate the event using HMAC and then to parse the event. What you do with it next is up to you. Do you want to send a message to Slack? Fire off an email? Respond to a comment with a link to your discord community? Do you want to tag an issue as a question?
For an example of a GitHub bot written in Go check out Derek.

Derek commenting on PRs
Here’s an example that I’ve translated to the OpenFaaS template to get you started. It validates that the incoming message has been signed with a HMAC secret that you entered on your repo’s webhooks page, then parses the event and will print a message in the function’s logs or an error for other event types.
package function

import (
	"bytes"
	"fmt"
	"net/http"
	"os"

	"github.com/google/go-github/v40/github" // with go modules enabled (GO111MODULE=on or outside GOPATH)
	handler "github.com/openfaas/templates-sdk/go-http"
)

// Handle a function invocation
func Handle(req handler.Request) (handler.Response, error) {

	webhookSecretKey, err := os.ReadFile("/var/openfaas/secrets/webhook-secret")
	if err != nil {
		return handler.Response{
			StatusCode: http.StatusInternalServerError,
			Body:       []byte(fmt.Sprintf("Error reading webhook secret: %s", err)),
		}, fmt.Errorf("error reading webhook secret: %w", err)
	}

	payload, err := github.ValidatePayloadFromBody(req.Header.Get("Content-Type"),
		bytes.NewBuffer(req.Body),
		req.Header.Get(github.SHA256SignatureHeader),
		webhookSecretKey)
	if err != nil {
		return handler.Response{
			StatusCode: http.StatusBadRequest,
			Body:       []byte(fmt.Sprintf("Error validating payload: %s", err.Error())),
		}, fmt.Errorf("error validating payload: %w", err)
	}

	eventType := req.Header.Get(github.EventTypeHeader)
	event, err := github.ParseWebHook(eventType, payload)
	if err != nil {
		return handler.Response{
			StatusCode: http.StatusBadRequest,
			Body:       []byte(fmt.Sprintf("Error parsing webhook: %s", err.Error())),
		}, fmt.Errorf("error parsing webhook: %w", err)
	}

	switch event := event.(type) {
	case *github.IssueCommentEvent:
		fmt.Printf("Issue comment body: %s\n", event.GetComment().GetBody())
	default:
		return handler.Response{
			StatusCode: http.StatusBadRequest,
			Body:       []byte(fmt.Sprintf("Event type not supported: %s", eventType)),
		}, fmt.Errorf("event type not supported: %s", eventType)
	}

	return handler.Response{
		Body:       []byte("Accepted webhook"),
		StatusCode: http.StatusAccepted,
	}, nil
}
Then create a secret for your webhook:
faas-cli secret create webhook-secret \
 --from-literal "S_3PPzytjNcgVfW"

Creating secret: webhook-secret
Created: 200 OK
Edit your stack.yml file and add a “secret”:
    image: ghcr.io/alexellis/repo-events:latest
    secrets:
    - webhook-secret
Then push a commit to the repository to trigger a new build.
Create an issue on your repository and leave a comment to trigger the function.
You’ll see the result in the function’s logs:
pi@faasd-pi:~ $ faas-cli logs repo-events
2021-11-29T12:03:43Z Issue comment body: faasd and Go at the edge
2021-11-29T12:03:43Z 2021/11/29 12:03:43 POST / - 202 Accepted - ContentLength: 16
Going further
We’ve now set up a full pipeline which deploys new versions of your code every time you commit into a GitHub repository using Actions and GHCR. Inlets provides us a secure uplink for both deployments and invocations.
I showed you how to connect events from a GitHub repository to your function, but many platforms offer webhooks like Gumroad and Stripe:
You may also decide to invoke your function from some internal system like Jenkins or on-premises BitBucket, without having those events go over the Internet. If your platform doesn’t support webhooks, then my eBook will show you how to trigger functions using a CRON schedule so that they can collect data from whatever sources you have in mind.
When no API or SDK is available for an event source, then faasd can also be used to scrape websites: Web scraping that just works with OpenFaaS with Puppeteer. Just note that this blog post will not work on your Raspberry Pi without some additional effort.
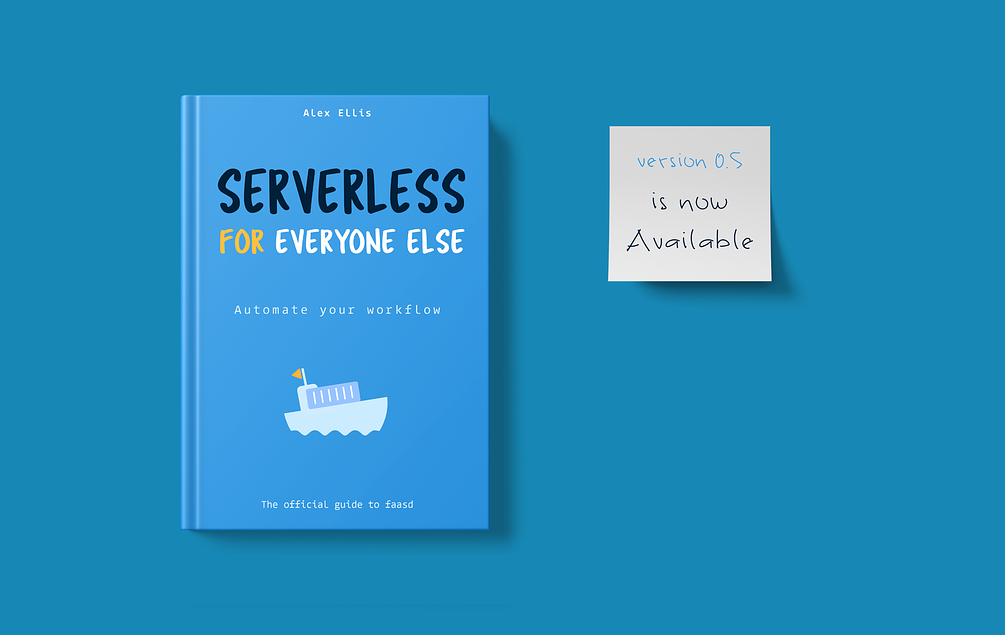
In my eBook Serverless For Everyone Else, I show practical examples of how to use the OpenFaaS REST API, connecting to databases, the asynchronous capability, private images and repos, custom domains and monitoring. You can also get a video of me walking through all those steps.
What if you really want to use K3s or Kubernetes? That’s also fine. Everything that I showed you including the GitHub Action and sample code will work with K3s or Kubernetes running on your Raspberry Pi or edge device. You’ll be paying a tax in CPU, memory and wear and tear on your SD card, but if you’re already heavily committed to Kubernetes, the tradeoffs may be worthwhile. I spoke about them and showed real-world use-cases in my talk at KubeCon 2020.
KubeCon: The Past, Present, and Future of Kubernetes on Raspberry Pi - Alex Ellis, OpenFaaS Ltd
Feel free to get in touch with me via Twitter or email with questions or comments.

Alex Ellis
Founder of @openfaas.