Venafi provides Machine Identity for the enterprise, learn how to try it out with OpenFaaS using the new Sponsored App
Announcement
Today we are announcing the availability of the Venafi Sponsored Apps for arkade.
-
Venafi provides Machine Identity to enterprise companies and is the primary sponsor of the CNCF project cert-manager. Machine Identity solutions allow for businesses to have finer-grain control over policy, governance, and the lifecycle of certificates.
-
arkade is a portable Kubernetes marketplace which can be used with any cloud or local Kubernetes distribution to install apps like the Kubernetes Dashboard, Istio, OpenFaaS and Minio. arkade is developed by OpenFaaS Ltd, the host company for OpenFaaS.
Each application is fully automated, and can be installed with a single command such as arkade install cert-manager. The arkade get command also provides a rapid way to download a number of DevOps CLIs like: kubectl, kops and terraform.
If you’re new to arkade, you can learn about it in our post: Why did the OpenFaaS community build arkade and what’s in it for you?
Machine Identity Management Development Fund
OpenFaaS Ltd is participating in Venafi’s Dev Fund which “brings to life new integrated solutions for DevOps, cloud-native, microservices, IoT and beyond” 1
The initiative’s aim is to make it as easy as possible for operators to set up Machine Identity on a Kubernetes cluster using Venafi’s two products for issuing TLS certificates.
The first product is cloud-based and called Venafi Cloud (or DevOps Accelerate). The second is called Venafi Trust Protection (TPP) which can be self-hosted on premises and tends to be used with an enterprise-grade Certificate Authority (CA) such as Active Directory.
The technical walk-through
In this post I’ll walk you through how to use the two issuers with OpenFaaS, but once you’ve gone through the initial setup, you will be able to use the issuers with any Ingress records you create.
Pre-reqs
You’ll need a Kubernetes cluster and a number of CLI tools.
For Windows users, you can use Git Bash to get a UNIX-compatible terminal for this tutorial.
The CLI tools can be downloaded through arkade’s get command:
curl -SLs https://get.arkade.dev | sh

# For MacOS and Linux users:
sudo mv arkade /usr/local/bin/

# For Git Bash users:
mv arkade /usr/bin/
Now get kubectl and faas-cli (which we will user later for OpenFaaS):
arkade get kubectl
arkade get faas-cli
TLS with cert-manager and LetsEncrypt
To begin with I want to show you what it looks like to configure cert-manger for OpenFaaS with LetsEncrypt. We’ll then move onto the two Venafi issuers.
We wanted to show that the Venafi Sponsored App will benefit more than just new and existing Venafi customers by adding these two additional IngressController apps.
Through the Venafi development fund, we also added support for:
Run the following commands to install each app:
arkade install cert-manager
arkade install nginx-inc
arkade install openfaas
arkade install openfaas-ingress \
  --domain gateway.example.com \
  --email user@example.com \
  --ingress-class nginx
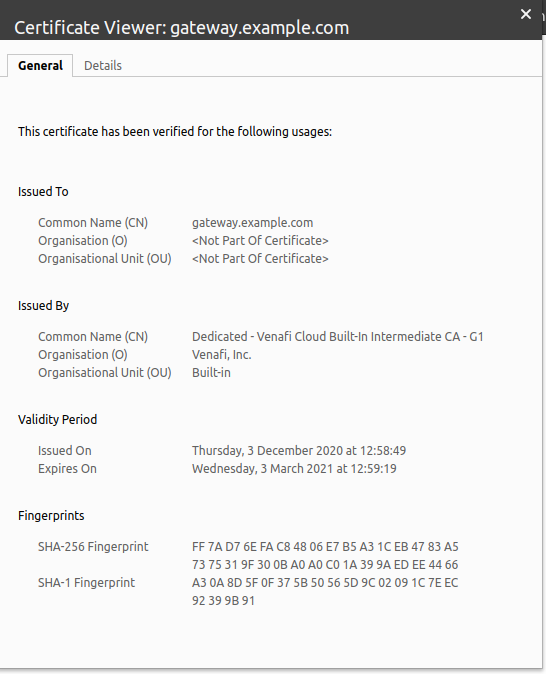
After creating a DNS A or CNAME record for the LoadBalancer created for nginx, cert-manager will negotiate with LetsEncrypt and provision a TLS certificate using the ACME HTTP01 challenge.
You will have TLS available at https://gateway.example.com
If you want to use Kong which was also added as part of the project, just change to the following:
arkade install cert-manager
arkade install kong-ingress
arkade install openfaas
arkade install openfaas-ingress \
  --domain gateway.example.com \
  --email user@example.com \
  --ingress-class kong
Before using arkade, we wrote documentation for how to do all of the above manually, and it was several pages long. As you can see here, arkade simplifies the task of navigating to various project homepages and installation instructions and brings together everything you could need to set up HTTPS for OpenFaaS.
The The
nginx-incapp is used for the commercial version, andingress-nginxis the version produced by Manuel Alejandro de Brito Fontes of the Kubernetes community.
Meet the Venafi command
Let’s meet the first Venafi app.
$ arkade venafi

Usage:
  arkade venafi [flags]
  arkade venafi [command]

Aliases:
  venafi, v

Examples:
  arkade venafi install [APP]
  arkade venafi info [APP]

Available Commands:
  info        Info for an app
  install     Install Sponsored Apps for Venafi

Flags:
  -h, --help   help for venafi

Use "arkade venafi [command] --help" for more information about a command.
Just like any other arkade app we provide an install and info command.
Let’s see what we can install?
$ arkade venafi install

Usage:
  arkade venafi install [flags]
  arkade venafi install [command]

Aliases:
  install, i

Examples:
  arkade venafi install [APP]
  arkade venafi install --help

Available Commands:
  cloud-issuer Install the cert-manager issuer for Venafi cloud
  tpp-issuer   Install the cert-manager issuer for Venafi TPP

Flags:
  -h, --help   help for install

Use "arkade venafi install [command] --help" for more information about a command.
TLS with Venafi Cloud
Now let’s install OpenFaaS and configure it to use Venafi Cloud to provision certificates.
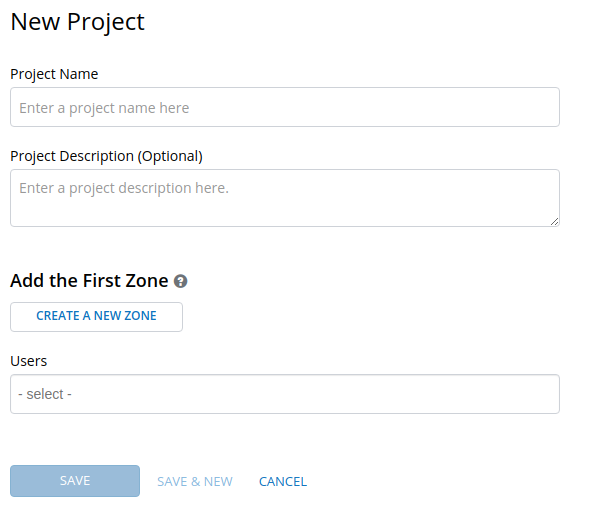
First head over to Venafi Cloud and sign up for a free trial. This will let you create certificates for the tutorial.
Create a new Project:
Create a Zone:
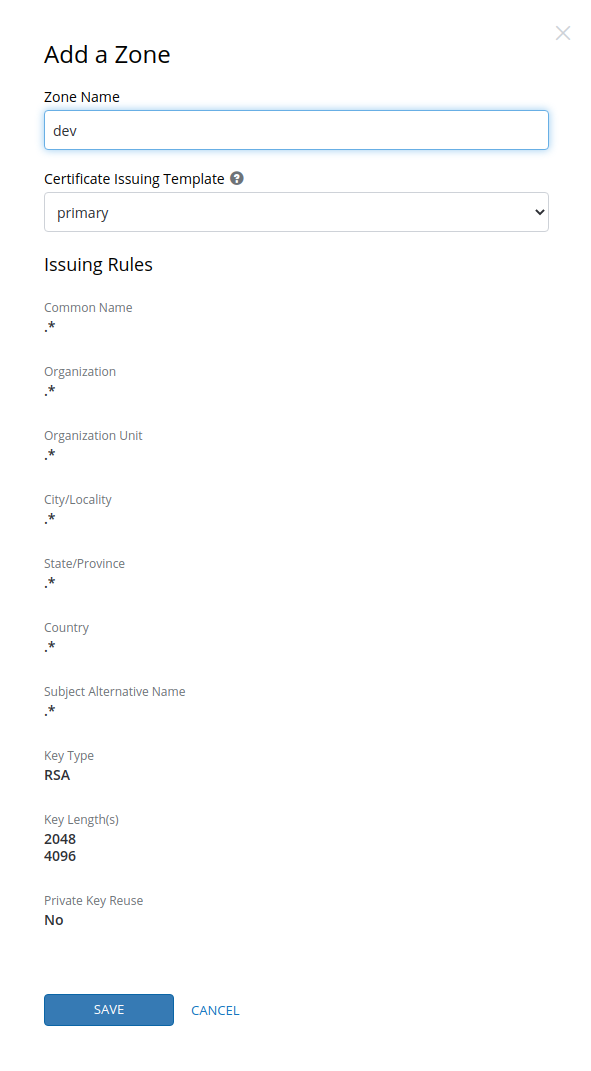
You can then configure Venafi to speak to your CA or issuer:
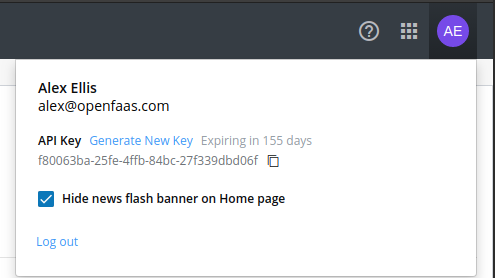
Now find your API key, don’t worry - this is not a live key that I’m showing, it’s just an example so you can see where to copy from.
Set up the apps for OpenFaaS just like before, but note the difference for the issuer this time around:
arkade install cert-manager
arkade install ingress-nginx
arkade install openfaas
Create a text file named $HOME/venafi-cloud-api-key.txt and add the API key on a single line with no spaces, hit save.
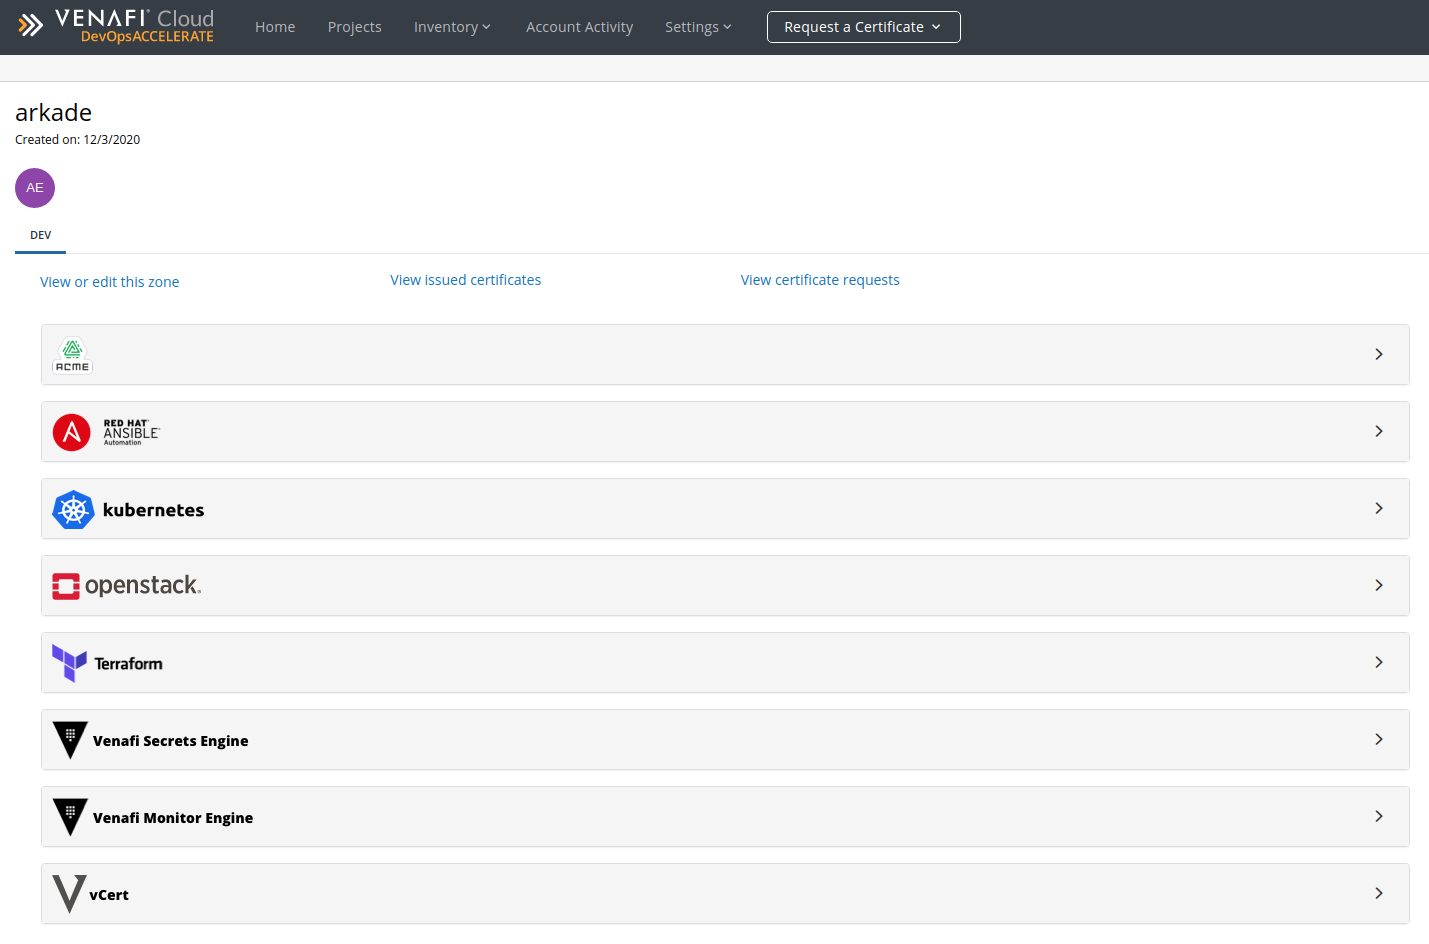
Take a note of the “Zone ID” which is a GUID, and enter it in the command below:
arkade venafi install \
  cloud-issuer \
  --zone e69a3780-3559-11eb-9bc3-0d8e5b5fdc3a \
  --namespace openfaas \
  --secret-file $HOME/venafi-cloud-api-key.txt
The --namespace is given because OpenFaaS was installed in the openfaas namespace, and we will be getting a TLS certificate for the gateway service in the same namespace.
Note that we didn’t have to provide the API key as a flag, which is more secure than potentially having our API key saved in bash’s history.
If you run arkade venafi install cloud-issuer --help then you will see what other options are available:
      --cluster-issuer       Use a ClusterIssue instead of an Issuer
  -h, --help                 help for cloud-issuer
      --name string          Name for the issuer (default "cloud-venafi-issuer")
      --namespace string     Namespace for the issuer (default "default")
      --secret string        Your Venafi cloud secret
  -f, --secret-file string   Your Venafi cloud secret from a file
  -z, --zone string          The zone for the issuer
You’ll be able to see the new issuer showing as ready:
$ kubectl get issuer cloud-venafi-issuer -n default -w -o wide
NAME                  READY   STATUS                  AGE
cloud-venafi-issuer   True    Venafi issuer started   4s
Now setup the Ingress record:
arkade install openfaas-ingress \
  --domain gateway.example.com \
  --issuer cloud-venafi-issuer
Note that with the LetsEncrypt example an issuer was created automatically, but now we have our own, we need to specify its name with: --issuer cloud-venafi-issuer
cert-manager will create a CertificateRequest, you can check it to see the status:
kubectl get CertificateRequest -n openfaas
NAME                     READY   AGE
openfaas-gateway-5wzbd   True    13m
When it goes to Ready, you’ll then see a Certificate created:
kubectl get Certificate -n openfaas
NAME               READY   SECRET             AGE
openfaas-gateway   True    openfaas-gateway   13m
For production usage, you will want to change example.com to your company’s domain name.
You can install other applications with arkade such as Istio, ArgoCD, and GitLab and then use the instructions from the cert-manager documentation to add an Ingress record for them.
TLS with TPP
TPP is Venafi’s solution for bringing Machine Identity to on-premises environments.
The usage instructions are similar to Venafi Cloud, learn usage through this command:
$ arkade venafi install tpp-issuer --help

Install the cert-manager issuer for Venafi TPP to obtain
TLS certificates from enterprise-grade CAs from self-hosted Venafi
instances.

Usage:
  arkade venafi install tpp-issuer [flags]

Examples:
  arkade venafi install tpp-issuer --help

Flags:
      --ca-bundle string            The path to a ca-bundle file
      --cluster-issuer              Use a ClusterIssuer instead of an Issuer for the given namespace
      --custom-fields stringArray   A number of custom fields for the TPP issuer and its policy
  -h, --help                        help for tpp-issuer
      --name string                 The name for the Issuer (default "tpp-venafi-issuer")
      --namespace string            The Kubernetes namespace for the Issuer (default "default")
  -p, --password string             Your TPP password
      --url string                  The URL for your TPP server including the "/vedsdk" suffix
  -u, --username string             Your TPP username
  -z, --zone string                 The zone for the issuer
Wrapping up
In a very short period of time, we were able to go from an empty Kubernetes cluster to serving traffic with cert-manager and a range of IngressControllers by using arkade apps. The arkade app for Venafi helped us discover and automate the installation of the two Venafi Issuers and made accepting an API key more secure through the use of a file instead of a command-line flag.
To summarise, we now have the following new commands for Venafi’s two cert-manager provisioners:
arkade venafi
arkade venafi install cloud-issuer
arkade venafi install tpp-issuer

arkade venafi info APP
And two new community apps:
arkade install nginx-inc
arkade install kong-ingress
It’s now over to you to try out OpenFaaS with cert-manager and one of the issuers we showed in the tutorial. Please do try out the new apps and let us know what you think.
Are there apps that you would like to see us add next? How about CLIs?
- Request an App or CLI to be added by raising an issue on GitHub
- Find out more about Arkade Sponsored Apps
- See also: Why did the OpenFaaS community build arkade and what’s in it for you?

Alex Ellis
Founder of @openfaas.