This article will demonstrate how to have an OpenFaaS instance up and running on a DigitalOcean droplet in around 5 minutes through an Ansible playbook. You can pick either Kubernetes or Docker Swarm in the tutorial.

DigitalOcean has described itself as “a simple and robust cloud computing platform, designed for developers”. It offers an Infrastructure as a Service (IaaS) platform where droplets - virtual servers to non-DOers - can be deployed in a multitude of flavours, sizes and locations. The company is very popular with open source developers and each October joins with GitHub to promote Hacktoberfest, the month long celebration of open source software and community.

Ansible is an open source based product by Red Hat that is described as “a radically simple IT automation engine that automates cloud provisioning, configuration management, application deployment, intra-service orchestration, and many other IT needs”. Put simply, it enables automated deployment of the full stack, enabling developers and engineers to describe their deployments through a series of yaml based tasks that are grouped into plays. These plays are collectively found in playbooks which are invoked through the ansible-playbook command.
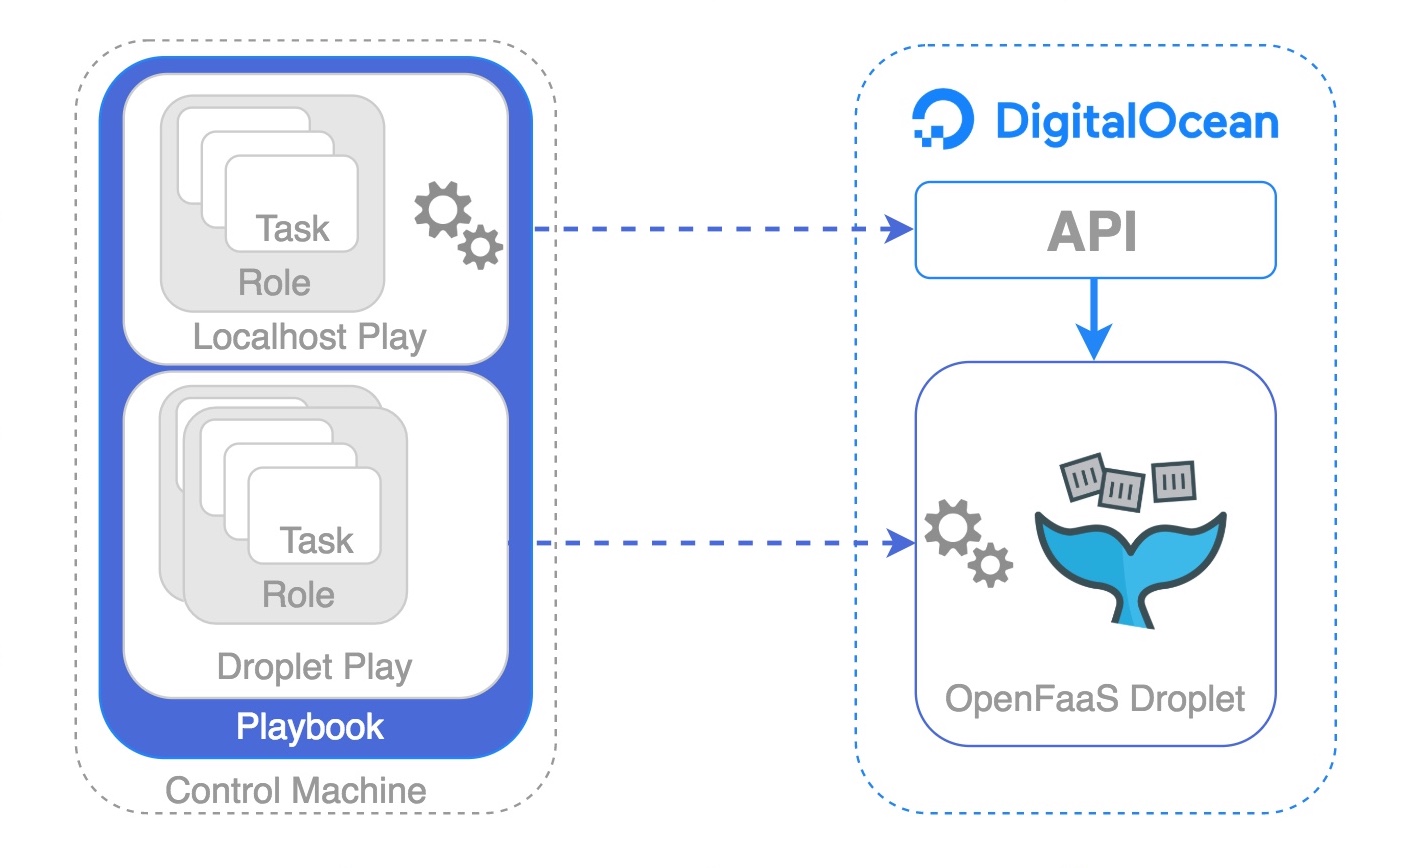
The playbook used here contains two plays:
-
the first play is executed on the control machine (your laptop). This uses the
dopymodule to drive the DigitalOcean API into creating a droplet as defined by a set of variables. Once the droplet starts to respond on port 22 the second play can commence. -
the second play executes its tasks on the newly create droplet. The control machine connects over SSH and executes a number of tasks to ready the droplet for deployment of OpenFaaS. The number of tasks will vary depending upon the chosen orchestrator.
Once the playbook completes the reader will have a fully functioning single node OpenFaaS instance.
Pre-Requisites
Ordinarily, a little pre-work is required in order to configure the automation environment, and as with most automation, the effort required upfront is far outweighed by the benefits borne out throughout its lifetime - xkcd illustrates this well. For the purpose of this article the Ansible based pre-reqs have been taken care of through the creation of a Docker image which already has Python, pip, dopy and Ansible installed. So, the only pre-requisite here is Docker on the machine where the playbook will be run from.
$ curl -sSL get.docker.com | sh
DigitalOcean account
In order to deploy onto DigitalOcean the reader must have an account and enable API access by generating an API key.
A DigitalOcean account with $100/60 days of credit can be created here - $100 is enough to try out this post and much more besides.
Create and upload an SSH key
Ansible is agentless and typically uses SSH to perform its remote tasks, so it is essential that the public side of the key being used on the control machine is entered into the DigitalOcean control panel. The play which will instruct the DigitalOcean API to create a new droplet will designate that this key should be deployed onto the new droplet upon instantiation.
$ ssh-keygen -t rsa

Generating public/private rsa key pair.
Enter file in which to save the key (~/.ssh/id_rsa): ~/.ssh/id_rsa_blog
Enter passphrase (empty for no passphrase):
Enter same passphrase again:
Your identification has been saved in ~/.ssh/id_rsa_blog.
Your public key has been saved in ~/.ssh/id_rsa_blog.pub.
The key fingerprint is:
SHA256:wSt8kCDCFdWnE8BFxyCVI+1vyK3wsERm9PjghOrqZ6w rgee0@MPB.local
The key's randomart image is:
+---[RSA 2048]----+
|o..oo +=*=o      |
|.....+ X++       |
|o  =.* o         |
|.o.oo.+.         |
|..+.o++ S        |
|o +o +           |
|. ..o @ o        |
| +  o +          |
|.   E+           |
+----[SHA256]-----+
The public key location should be provided in the output of the key generation command.
Your public key has been saved in ~/.ssh/id_rsa_blog.pub.
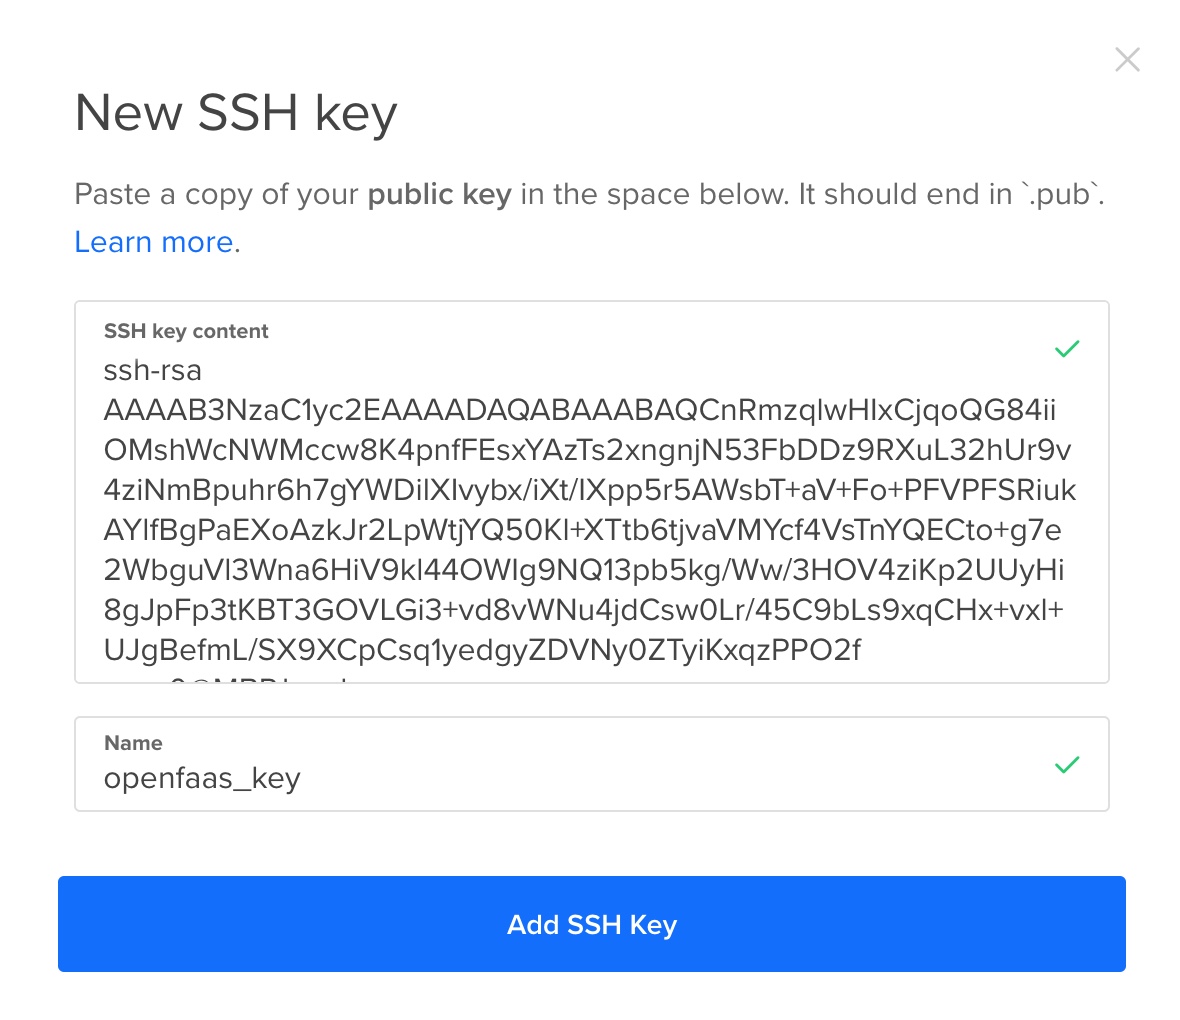
Visit the Security area of the DigitalOcean Control Panel, locate SSH Keys section and the Add SSH Key button. Copy the contents of the public key into the resulting box and choose an appropriate name.
Generate a Personal Access Token
Still within the DigitalOcean Control Panel, visit the API section and generate a new Personal Access Token with both read and write scopes enabled. Note down the resulting value as this will be needed to enable the playbook to authenticate and also to ascertain the sshid of the SSH key.
Find the SSH Key sshid
Open a terminal and run the following command to obtain the sshid that DigitalOcean has assigned to the SSH key that was previously uploaded.
Availability of the json parsing tool, jq, has been assumed here. jq is a very small but powerful utility available in these ways.
$ export DOTOKEN=<API token> && \
  curl -X GET -H 'Content-Type: application/json' \
   -H 'Authorization: Bearer '$DOTOKEN \
   "https://api.digitalocean.com/v2/account/keys" 2>/dev/null \
   |  jq  '.ssh_keys[] | {name: .name, id: .id}'

{
"name": "openfaas_key",
"id": 12345000
}
In this example there is only one key, and so the sshid of interest is 12345000. Where there are multiple keys configured obtain the id associated with the name entered when uploading the key.
Configure the Playbook
Clone the playbook:
$ mkdir -p ~/openfaas && \
  cd ~/openfaas && \
  git clone https://github.com/rgee0/openfaas-on-digitalocean.git .
The playbook definition can be found in site.yml. The API key and chosen sshid now need adding to the playbook as variables in the create_droplet role used in the first play.
Navigate to create_droplet/vars/main.yml and add the two earlier obtained values as the token and sshid variables. Although the playbook has been tested with the default values it is also possible to adjust the size of the machine to be deployed, the region and the OS image.
The resulting main.yml should look similar to this:
---
  token: BE39Z34848C963914765D5DAB11DB123CB5D28F96067E538ZA
  sshid: 12345000
  size_slug: s-2vcpu-4gb
  region: lon1
  image: ubuntu-18-04-x64
Run the Playbook
Having added the required detail to create_droplet/vars/main.yml then the playbook is ready to be run. Running the playbook will call upon a Docker image, rgee0/ansible-playbook:2.6.2, which offers a ready-made Ansible environment.
If you’d prefer to build your own Docker image the Dockerfile can be found here
Three volumes are mounted, two make the SSH key-pair available to Ansible - the values represented below are consistent with locations used earlier, ensure these are changed if different locations / names were used. The final volume mounts the project directory into the container so that Ansible can access the playbook.
All that remains is to choose one of the two orchestrators and pass the value as a extra variable:
Here the orchestrator is set to k8s to provide a Kubernetes based instance
$ cd ~/openfaas && \
  docker run --rm -it \
  -v $(pwd):/ansible/playbooks \
  -v ~/.ssh/id_rsa_blog:/root/.ssh/id_rsa \
  -v ~/.ssh/id_rsa_blog.pub:/root/.ssh/id_rsa.pub \
  rgee0/ansible-playbook:2.6.2 site.yml -e "orchestrator=k8s"
Similarly, the orchestrator can be set to swarm to provide a Swarm based instance
$ cd ~/openfaas && \
  docker run --rm -it \
  -v $(pwd):/ansible/playbooks \
  -v ~/.ssh/id_rsa_blog:/root/.ssh/id_rsa \
  -v ~/.ssh/id_rsa_blog.pub:/root/.ssh/id_rsa.pub \
  rgee0/ansible-playbook:2.6.2 site.yml -e "orchestrator=swarm"
Head over to the UI
As the playbook completes, a set of information will be displayed, which will guide you to the OpenFaaS UI on the new droplet. As authentication is enabled by default the credentials needed to satisfy this are also provided.
ok: [209.97.188.227] => {
   "msg": [
       "OpenFaaS Gateway: http://209.97.188.227:8080",
       "Gateway User: admin ",
       "Gateway Password: c2db2b6d59df518392a81eff57",
       "CLI Gateway Login: echo -n c2db2b6d59df518392a81eff57 | \
                           faas-cli login --username=admin  \
                           --password-stdin -g http://209.97.188.227:8080"
    ]
}

PLAY RECAP **************************************************

209.97.188.227    : ok=12  changed=6  unreachable=0  failed=0
localhost         : ok=6   changed=2  unreachable=0  failed=0
Next steps
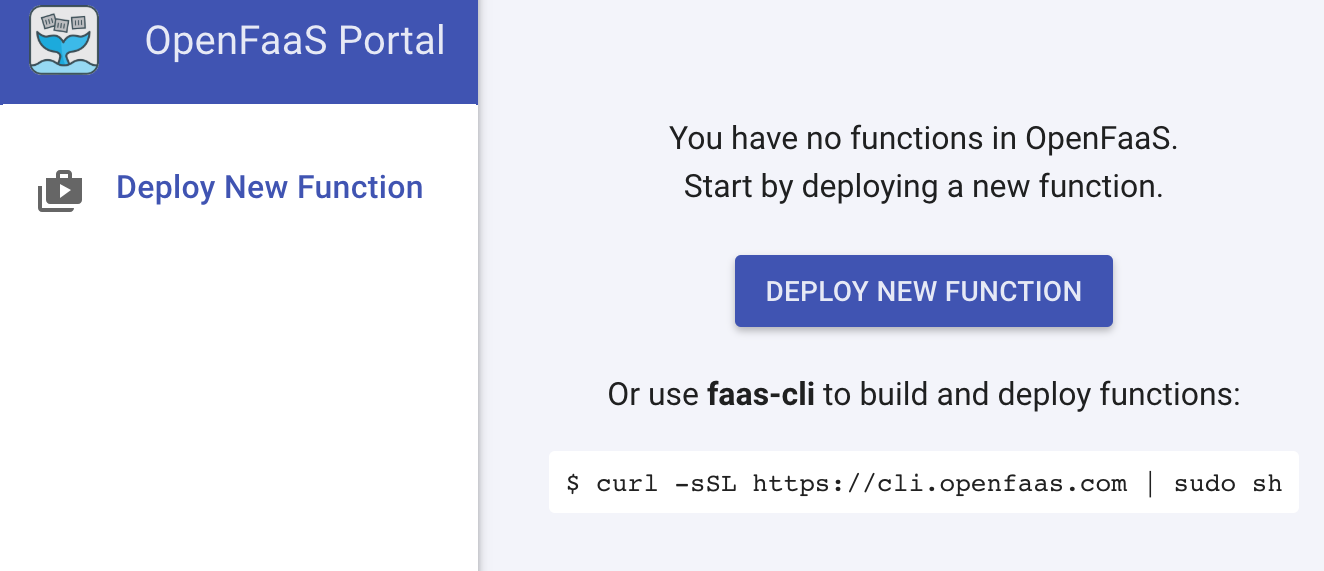
The quickest way to deploy a function to the new instance is to grab one of the pre-built functions from the store. Click Deploy New Function in the UI.
Why not use the fresh OpenFaaS instance in conjunction with the learning materials in the OpenFaaS Workshop to help accelerate learning around the project, its features and potential applications. Having already deployed an instance it’s possible to skip to the OpenFaaS CLI section in Lab 1 and then head straight into Lab 2.
To keep in touch with future community led features then subscribe to the OpenFaaS YouTube channel and be notified as new content is added.
Acknowledgements
Thanks to Marko Wallin for the inspiration behind the Ansible Docker image.

Richard Gee
Derek contributor, Former Core Team